Essential Backpacking Gear for Beginners
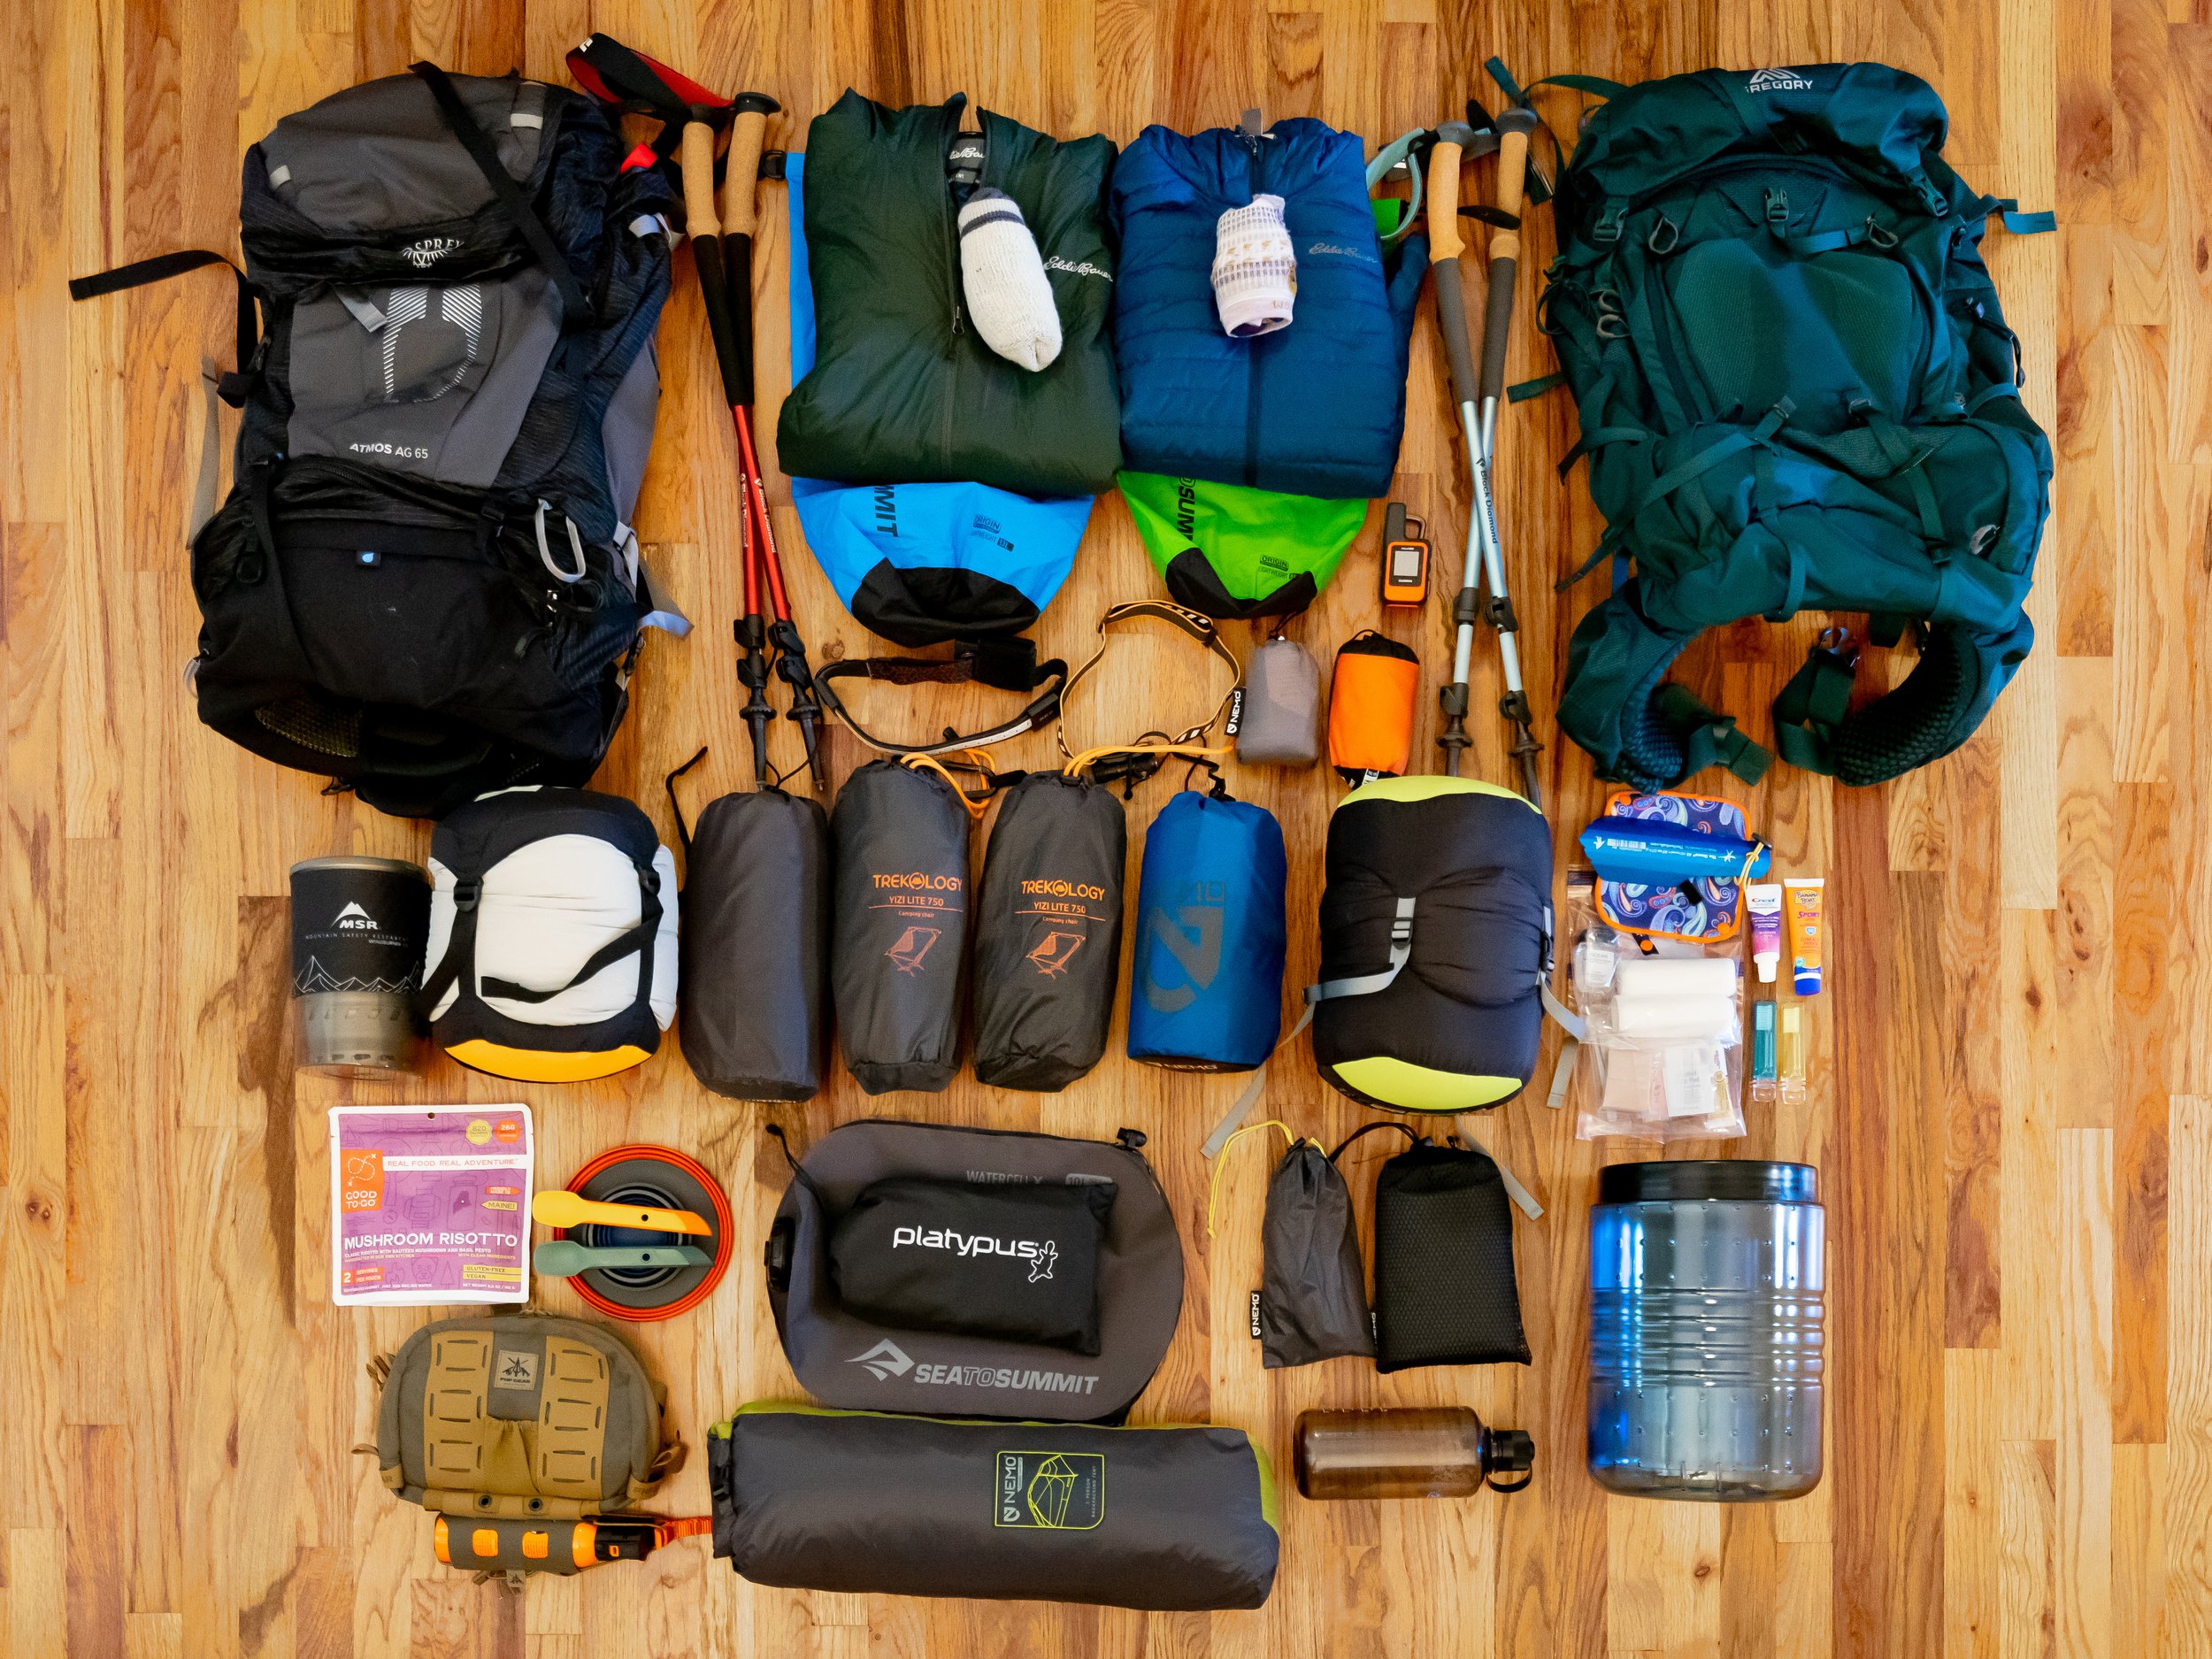
As beginner backpackers ourselves, we have spent countless hours researching and shopping around for the gear that would work best for our trip needs.
Having spent most of our adult lives hiking and enjoying the outdoors, we were familiar with the concepts that come along with extending those adventures overnight in the backcountry, but had a few details to work out.
This post may contain affiliate links. That means if you click and buy, we may make a commission at no cost to you.
WEIGHT VS COMFORT
The biggest consideration for us was weight versus comfort.
There’s a lot of information out there about going ultralightweight with your backpacking setup, which was (and is) very appealing to us. The idea of carrying a fraction of the weight is obviously a good thing, but we’ve found that it all comes down to personal preference. Unless your plan is to go 100% ultralight, you will find that you’re able to shed weight in certain areas while adding a few extra ounces in others in the name of comfort.
There are a few luxuries like a tent with double doors and extra interior space or a sleeping bag and inflatable mattress that slept more like our bed at home that we found appealing. However, we’ve tried to make up the extra weight by carrying a lighter stove, a bear canister only when necessary, and finding the lightest weight tent that still has the features we are looking for.
Keep in mind that this all comes at a cost. While you can gather your backpacking gear for fairly cheap, the lighter you go while still maintaining good quality is going to up the price.
BACKPACKING GEAR LIST
ESSENTIALS
OTHER CONSIDERATIONS
BACKPACK
First things first - you will need a backpack.
Choosing the right backpack can significantly impact your time on the trail so it’s important that you do your research before making a decision. And, we don’t just mean choosing the right size and color.
Backpacking packs come in different volumes, sizes, and weights. The pack you choose will depend on your intended trip length and conditions. The fit will be specific to you and your body and some things like the added features will be up to personal preference.
Will you be doing weekend trips, week long trips, etc?
Are you going for minimalist backpacking or comfort?
What features are you looking for (side pockets, trekking pole holders, removable day packs, etc.)?
The majority of our trips are 2-3 nights on average. We don’t intend to be hardcore ultralighters, so we opted for a more common backpack that has a few added features. We both carry trekking poles so we like to have a specific place to store them, we prefer those that have breathability, and we like the fit each of these packs below. Both have the front mesh pocket to easily store our rain gear, an accessible side pouch for a water bottle, adjustable hip belt and straps to allow for micro adjustments on the trail, and many other features that made these packs the right choice!
TENT
If you plan to go backpacking, you’re going to need shelter. For most people, this is a tent, but there are a variety of options like hammocks and tarps, bivy, flattarp, tentarp etc. Similar to backpacks, backpacking shelters aren’t one size fits all.
How many people will be sleeping in it?
What type of conditions will you find yourself in the most?
What type of structure is suitable for the expected terrain?
What features are important to you?
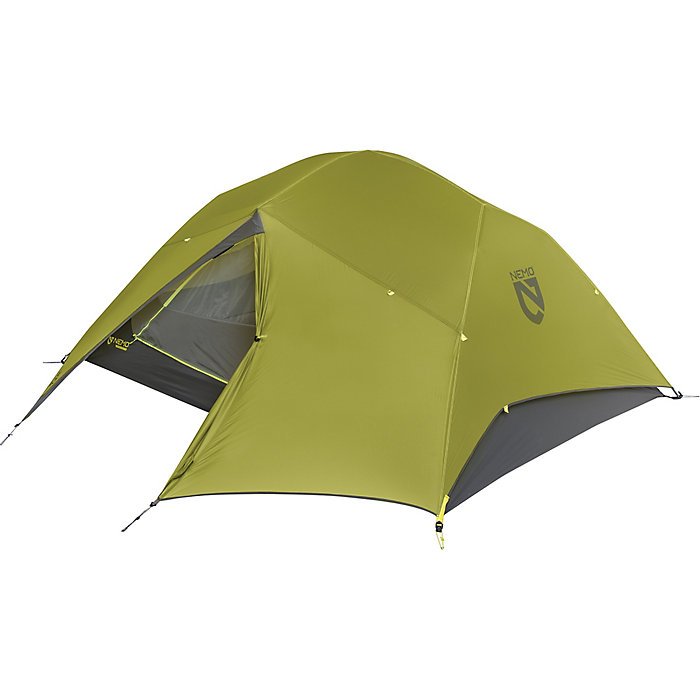
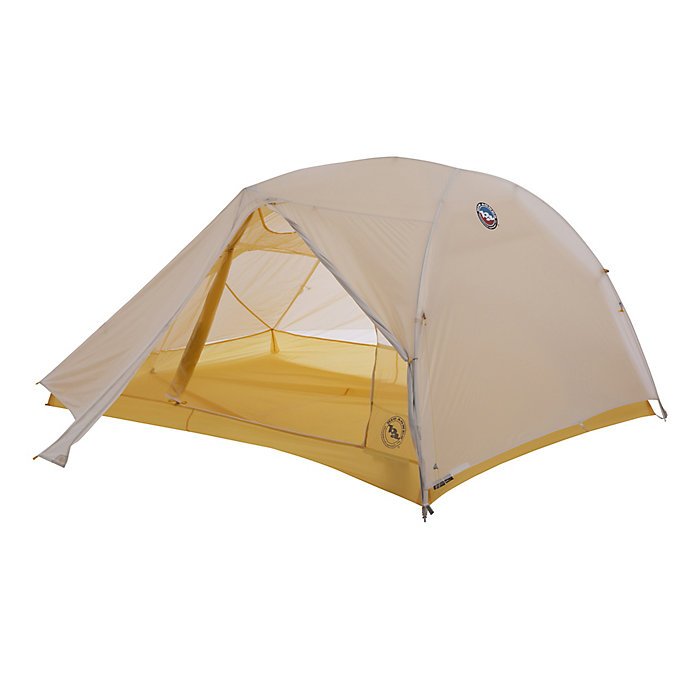
We recommend the Nemo Dagger 3-person (3P) tent or the Big Agnes Tiger Wall 3 UL3 Tent: 3-Person 3-Season. We opted for comfort and chose a 3P tent for two people for the extra living space. We wanted a double-wall tent to keep the moisture out, double doors to allow easy access for both people, and the two vestibule spaces for gear. The noticeable difference here is the weight. While both are great choices, the Big Agnes is lighter weighing in at 1lbs 13oz where as the Nemo Dagger 3P Tent weighs 3lbs 12oz.
SLEEP SYSTEM
A sleeping bag and sleeping pad are often considered one piece of gear and referred to as a sleep system. Both items work together to create a safe and comfortable sleeping experience.
One thing many people may not realize is that, aside from the basic specifications like size, shape, and color, both sleeping bags and sleeping pads have individual temperature ratings. While your sleeping bag keeps you warm by acting as a blanket, your sleeping pad creates a layer of insulation between you and the ground. When shopping for each item, consider the individual temperature ratings and ensure they both compliment one another.
Will you be camping in hot or cold weather, or both?
Are you looking for space saving or comfort?
Do you sleep on your side, back, or stomach?
What shape of sleeping pad and sleeping bag would fit your sleeping style?
Are you a hot or cold sleeper?
We love the spoon shape of the NEMO Disco bags because it allows for extra room when rolling to your side. We prefer bags over quilts and love that these bags below have vents you can zip open to allow for cooling without fully unzipping down the side. These bags also have a slip pocket inside the hood, perfect for keeping an inflatable pillow in place throughout the night. We found these to be great 3-season sleeping bags which is perfect when planning to backpack in the spring, summer, and fall.
Our two recommendations for sleep pads are the NEMO Quasar 3D and Therm-a-rest NeoAir XTherm.
While the NEMO Quasar 3D Insulated pad provides a little extra comfort, the Therm-a-rest has a high temperature rating making it a great option for colder temperatures. The NEMO Quasar 3D is our go-to pad because it feels less like a sleep pad and more like your bed! NEMO added a concave feature to their pad making it feel as if you are sleeping in your bed at home!
Again, when choosing a sleeping pad, be sure to consider the temperature rating of the pad and what kind of weather you plan to be camping in. The temperature rating is defined by the R-value you see when looking at the pad specifications.
WATER FILTER
How will you get clean water while on the trail? If you’re used to day hiking, you’re probably used to packing in all the water you would need, but water is heavy, weighing in at 2.2 pounds per liter. A good water system is one of the most important things you will bring and there are a lot of different options out there - pump filters, gravity filters, UV filters, squeeze filters, straw filters, chemicals, etc.
It’s important to understand that filtering water isn’t the same as purifying water. Most will filter water meaning they filter out protozoa and bacteria - generally sufficient unless traveling outside of the US. Water purifiers filter out protozoa, bacteria, and viruses, which are more common in water sources outside the US.
Do you need a water filter or water purifier?
Which type of filter do you find the most convenient?
How long will the filter last before you need to replace it?
Should you carry a back-up?
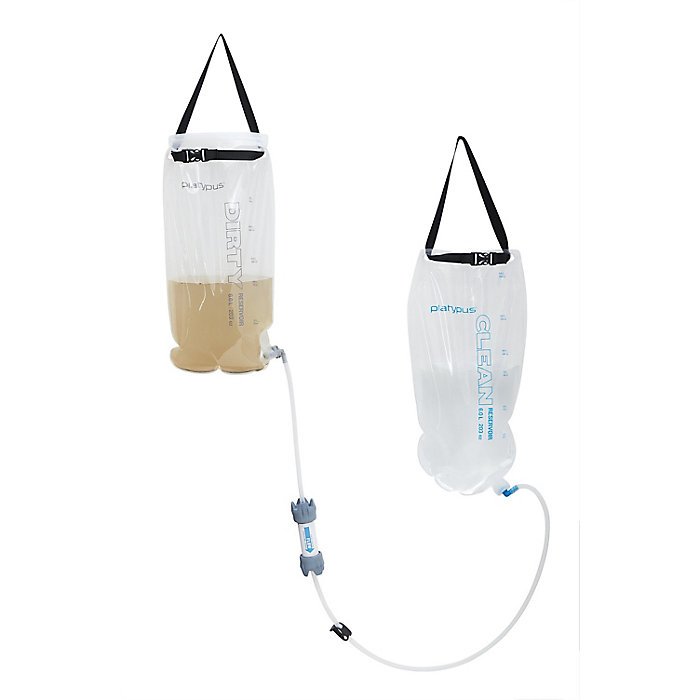
We currently carry a Platypus gravity filter. The filter itself works amazing, filtering water at a fairly quick rate, not leaving us stopped on the trail for extended periods of time. We don’t notice any lingering taste in the water we filter. It’s lightweight and easy to set up! This system also doubles as a water carrying bag for up to 12 Liters for those situations when your campsite isn’t very close to a water source and you need to pack in extra.
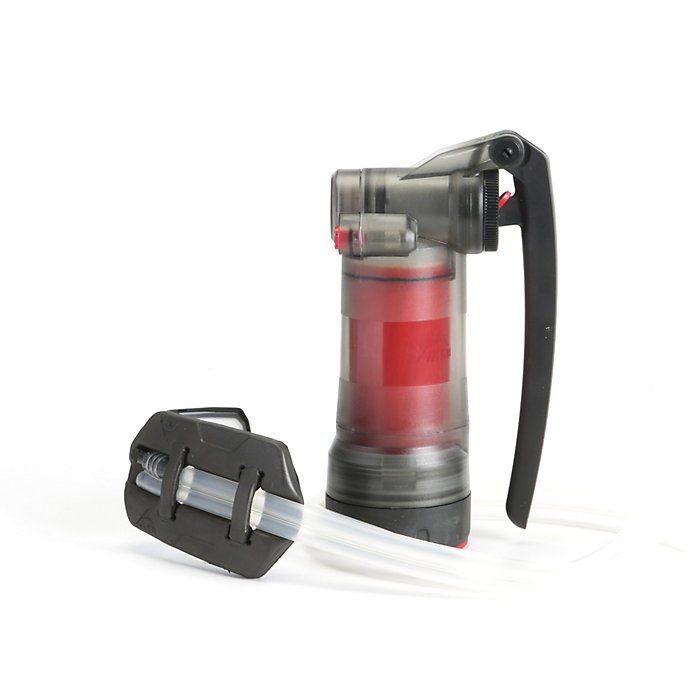
Since all of our travels are within the United States, we don’t have the need for a water purifier just yet. If you do, however, the MSR Guardian is the best choice available right now. It’s a little pricey but the filter is guaranteed for 10,000+ liters which is more than most will use in their lifetime.
COOK SYSTEM
To cook on the trail, you’ll need something to at least boil water in. Some camp stoves come ready to use with both items included while others are sold separately meaning you by the stove and pot or kettle individually. There’s no right or wrong, just personal preference.
How many people will you be cooking for?
What weight/size works for you?
Do you prefer self-igniting or will you need to carry a lighter/igniter?
What type of fuel does it use and is it accessible to you?
How fast does it bring water to a boil?
We prefer the MSR Windburner Due Stove for convenience and the MSR Pocket Rocket Deluxe for lightweight.
We loved the convenience of the built in wind cover of both. Many stoves, especially those made to save weight, have exposed flames. It can be tricky keeping it lit when in exposed areas making it almost essential to carry a wind guard to protect the flame. We also found the MSR Windburner to be one of the more efficient stoves, boiling 1L of water in just over 2 minutes. However, it is heavier than most. If we are needing to shed a few ounces, the Pocket Rocket Deluxe stove is our go-to. Keep in mind that the Pocket Rocket is just a stove and you will need to purchase a pot or a kettle separate. Here is a good option for pots you can find on amazon.
DINNERWARE
One of the more simple items to pick out and also one of the easiest to forget - something to eat with! Even with something this simple, there are still some things to consider. Will you need a fork, a spoon, and a knife or will just a spork work for you? What material do you prefer? How long does it need to be?
We chose the UCO Switch and love them because of the compact size and durability. It is a fork, spoon and knife, but the best part is, it extends to create a long spoon, perfect for reaching the bottom of meal bags without getting your hands messy!
BATHROOM KIT
One of most people’s biggest concerns is how to use the bathroom on the trail.
Most of your bathroom kit will be items you already have at home like toilet paper and hand sanitizer. These will go straight into a zip lock bag to keep away from water. Other items you may need include a trowel and pee cloth. You certainly don’t want to forget these, unless you prefer to wipe with leaves!
OTHER ITEMS TO CONSIDER
TREKKING POLES
For some, trekking poles are an essential piece of gear while for others they are just added weight. Trekking poles are great for giving you extra stability especially if you’re not used to carrying weight on your back.
They help take stress of your joints, and they can help distribute up to 20% of your weight from your legs to your arms. Trekking poles can even act as tent poles in some setups.
Whether or not you bring trekking poles is personal preference but here are a few things to consider if purchasing a pair.
Is the shape of the grip comfortable to you?
Do you prefer rubber or cork grips?
Are they convenient to extend/collapse?
We chose the Black Diamond Trail Ergo Cork Trekking Poles because of the durability, weight, and cork grips. They are comfortable and, for us, an essential piece of gear on the trail.
Black Diamond Trail Ergo Cork
SATELLITE COMMUNICATOR
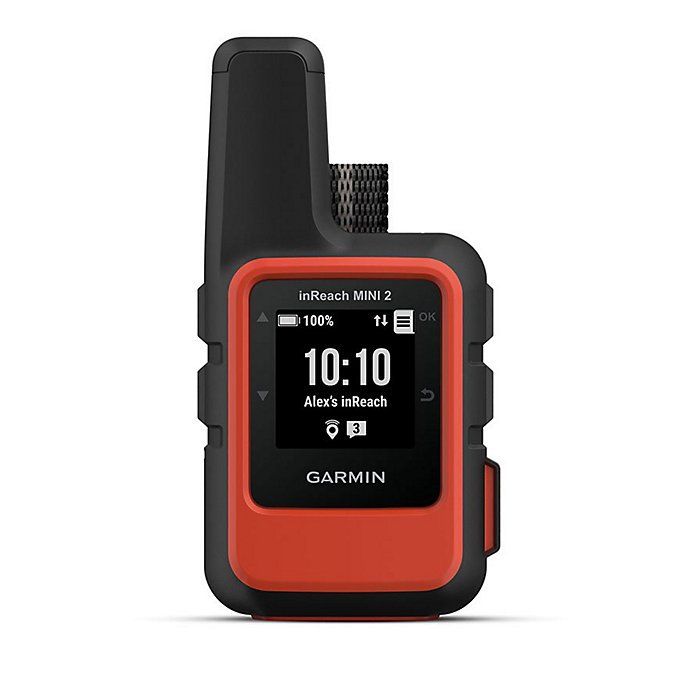
While not essential in order to go backpacking, a satellite communicator is highly recommended and can be life-saving. They can be pricey but the price is worth it even if it’s only ever used to give loved ones a piece of mind.
When out in the back-country you, should never count on having service. A satellite communicator allows you to check-in by sending texts to family or friends and can also send for help in emergencies. Some devices also allow you to check the weather which is great when in the backcountry for multiple days.
Garmin InReach Mini GPS
BEAR SPRAY + BEAR CANISTER
Will you be hiking in bear country?
A bear canister or bear bag is a vessel that holds all your food and any scented items to keep them away from bears.
Bear spray is a deterrent you carry in case you come in contact with a bear. Not only is it important to have the right supplies for your own safety but some areas may require it. Be sure to look up regulations and carry the correct gear.
When in bear country, we carry the Bear Vault Bear canister and a spray.
Bear Vault BV500 Bear Resistant Food Canister
Counter Assault Bear Deterrent Spray + Belt Holster
CLOSING THOUGHTS
Remember that a big part in choosing the right gear is knowing what works for you. Each piece of gear comes in a variety of options and what works for one person may not work for another so doing your homework is key.
Thoughtful research and planning can really impact the time you have out on the trail. If you’re ever unsure about what to choose, reach out and ask somebody who has experience being in the backcountry.
We hope this list of essential backpacking gear for beginners helps you get started!
If you have any questions about the gear we list above, leave a comment below!
That’s all for now!
Catch ya next time.
Taylor and SethHi, we’re Seth and Taylor and we love sharing all things related to outdoor adventure!
We love anything that gets us outside — hiking, biking, backpack, road tripping, and so much more! We love sharing our adventures and hope it helps YOU get out to see more.
Newsletter:
Be the first to know when we release something new and sign up for our Newsletter!









This photo journal invites you to explore the vibrant heart of San Francisco, a city renowned for its iconic landmarks, diverse neighborhoods, and breathtaking vistas. From the majestic Golden Gate Bridge to the charming streets of Chinatown, each image captures the essence of a city that is both timeless and ever-evolving. As you wander through these images, let the unique character and beauty of San Francisco unfold before your eyes, offering a glimpse into the spirit and stories that make this city truly unforgettable.